Printer setup & testing (beginner)
Steps
-
Step 1 (F01): Open the Printer screen
Tap Printer in the left sidebar and confirm you're in the correct module.
- Register button appears at top-right
- Registered printer list appears in the center
- Receipt template section appears below

-
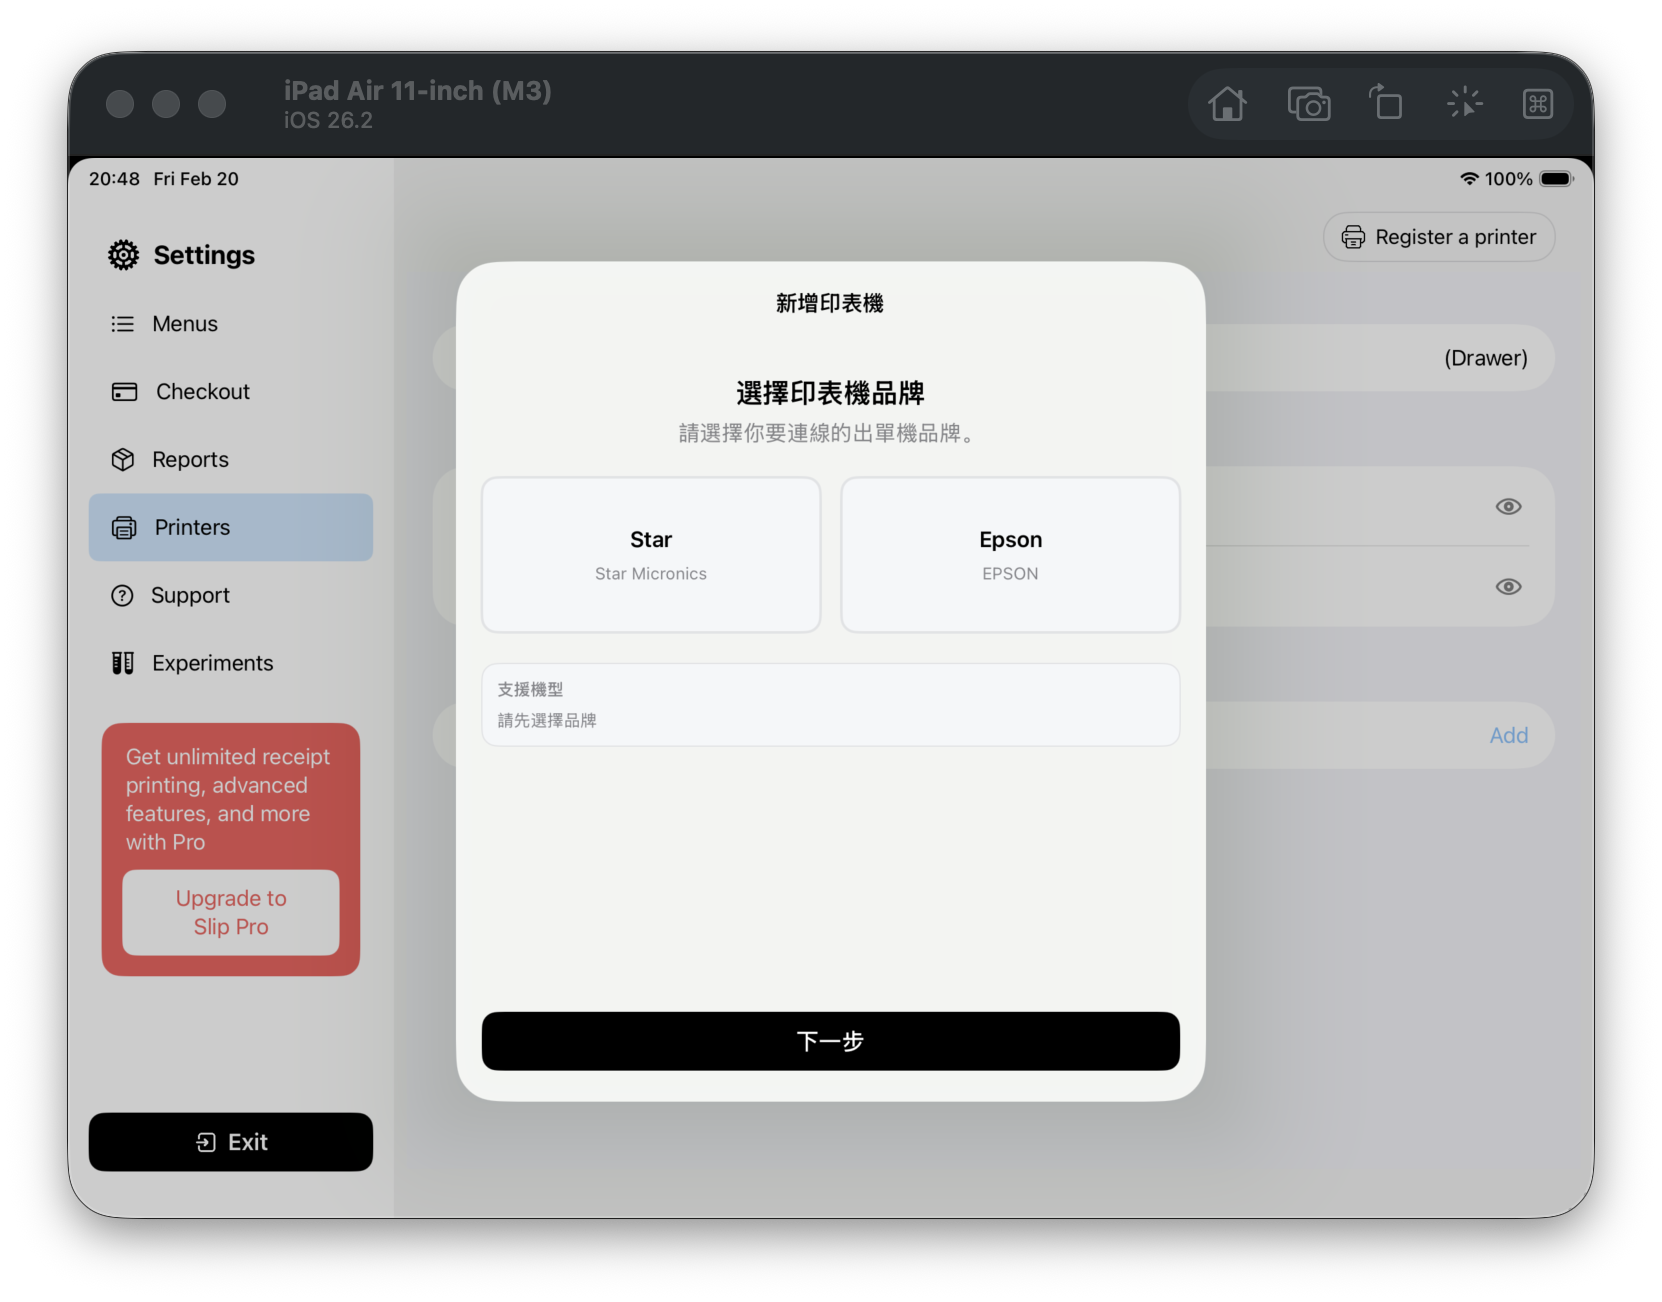
Step 2 (F02): Start printer registration
Tap Register at top-right to enter brand selection.
- You can see Star / Epson brand cards
- Next is initially disabled
-
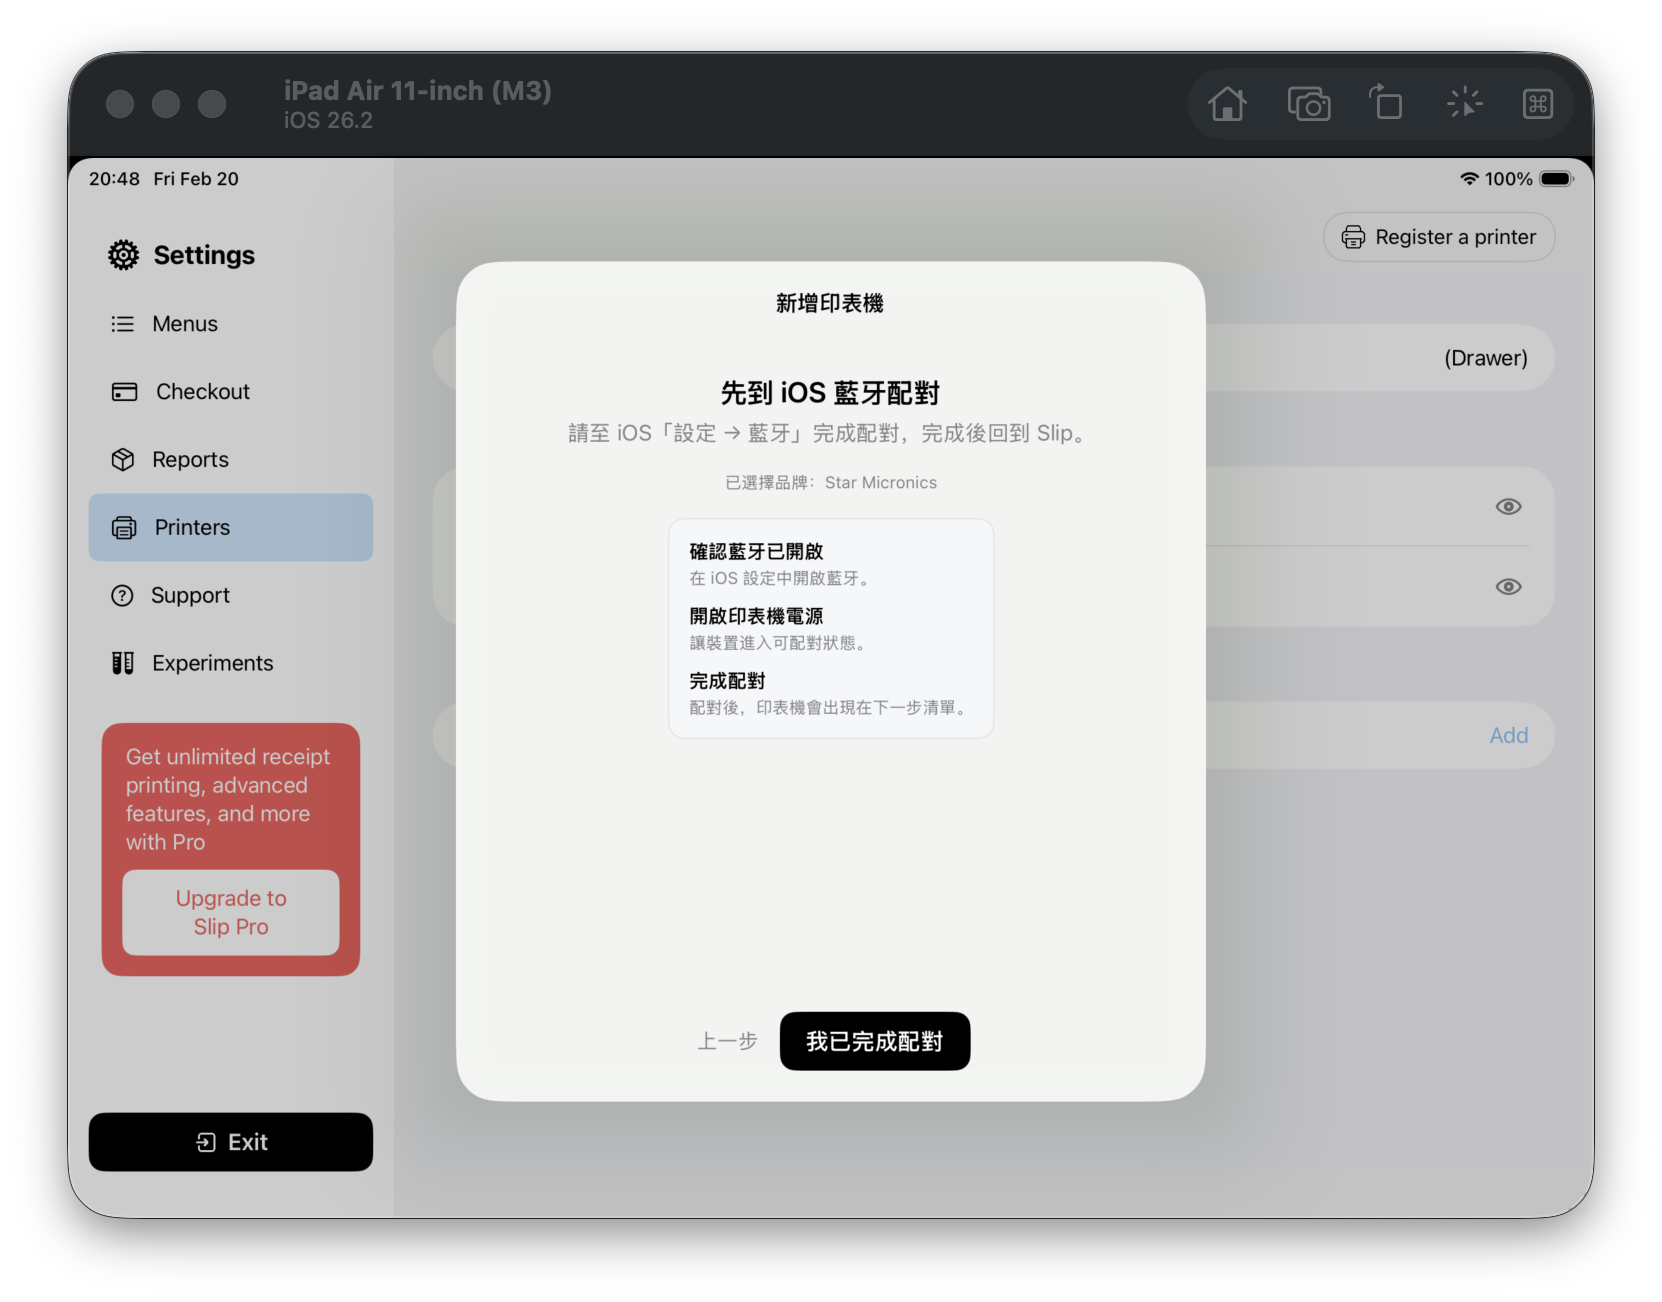
Step 3 (F03): Choose brand and go to pairing guide
Select a brand (for example, Star), then tap Next.
- You enter the iOS Bluetooth pairing instructions
- You can see I have paired
-
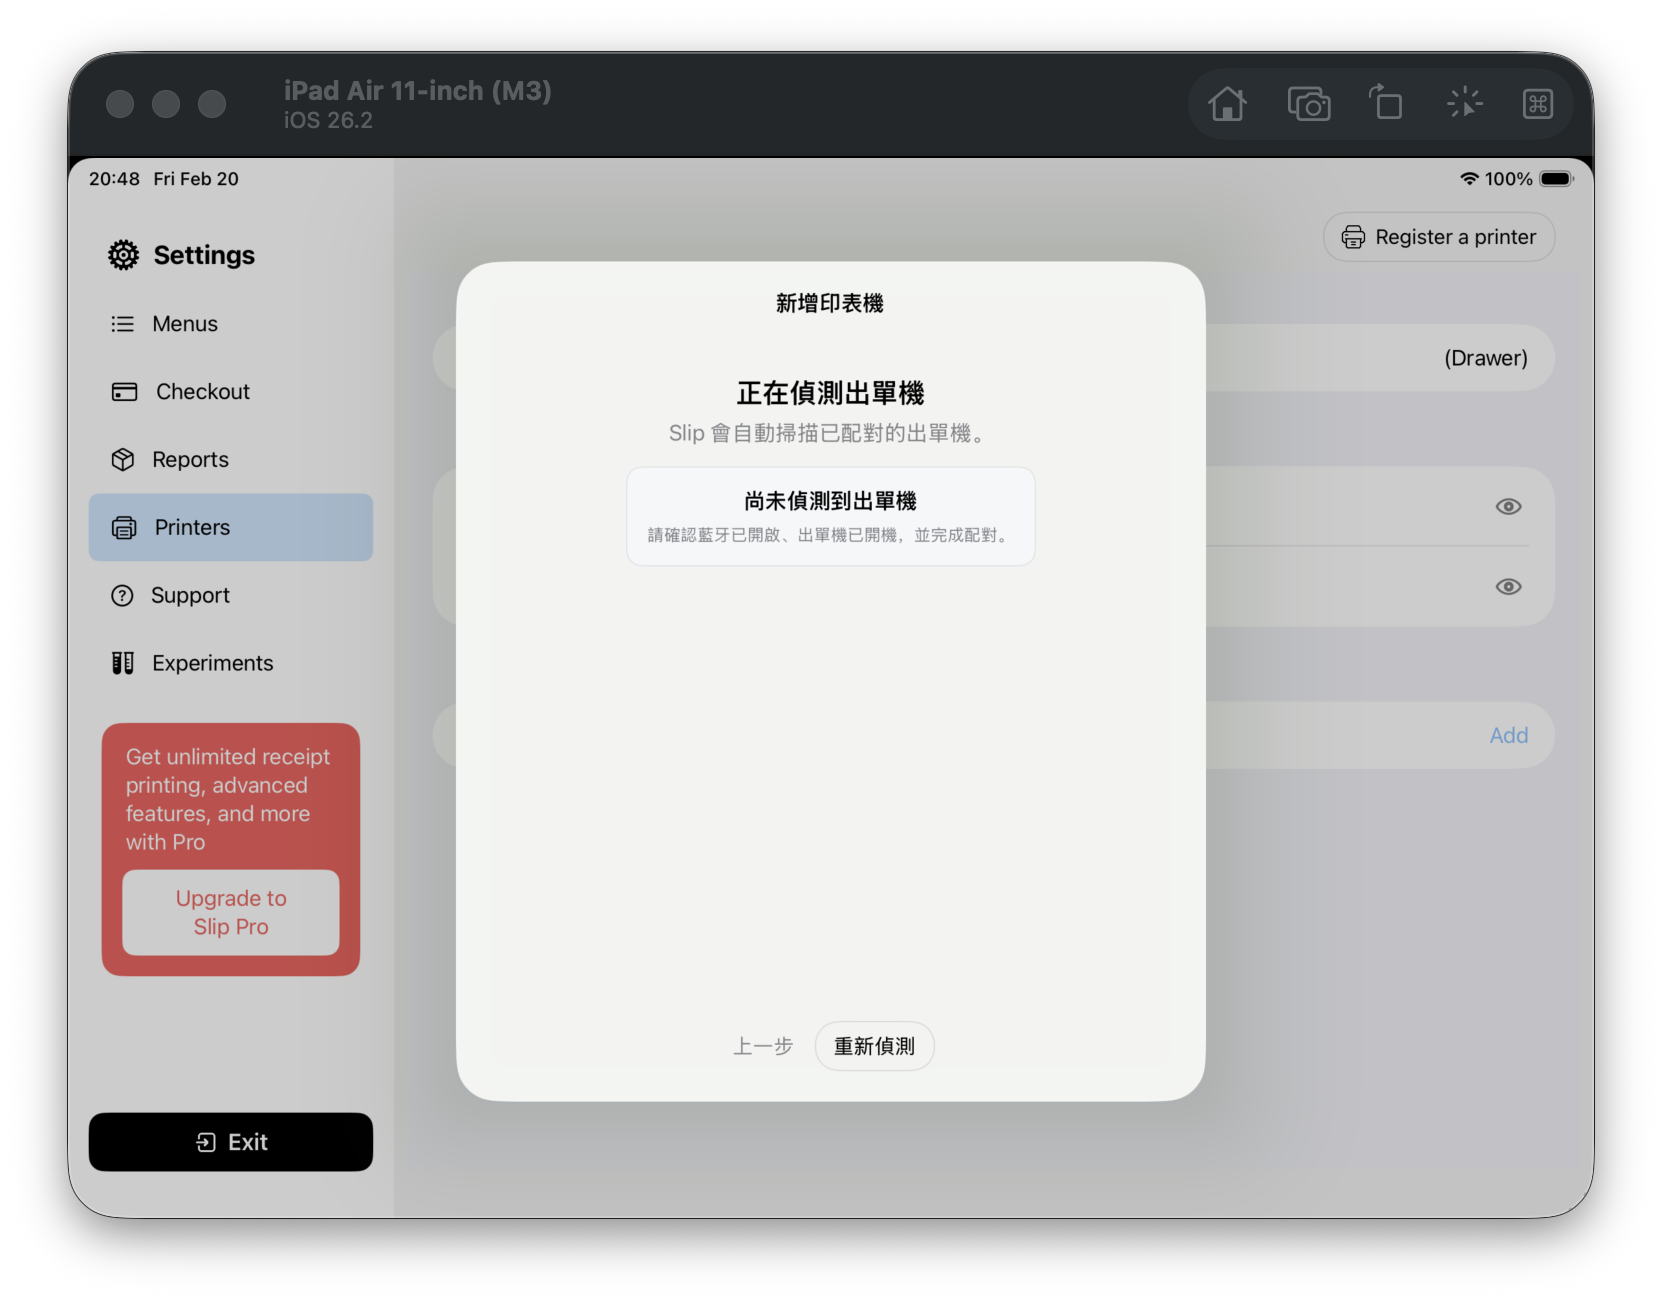
Step 4 (F04): Go to device discovery
On the pairing guide screen, tap I have paired.
- You enter the discovery step
- You can see Retry discovery
-
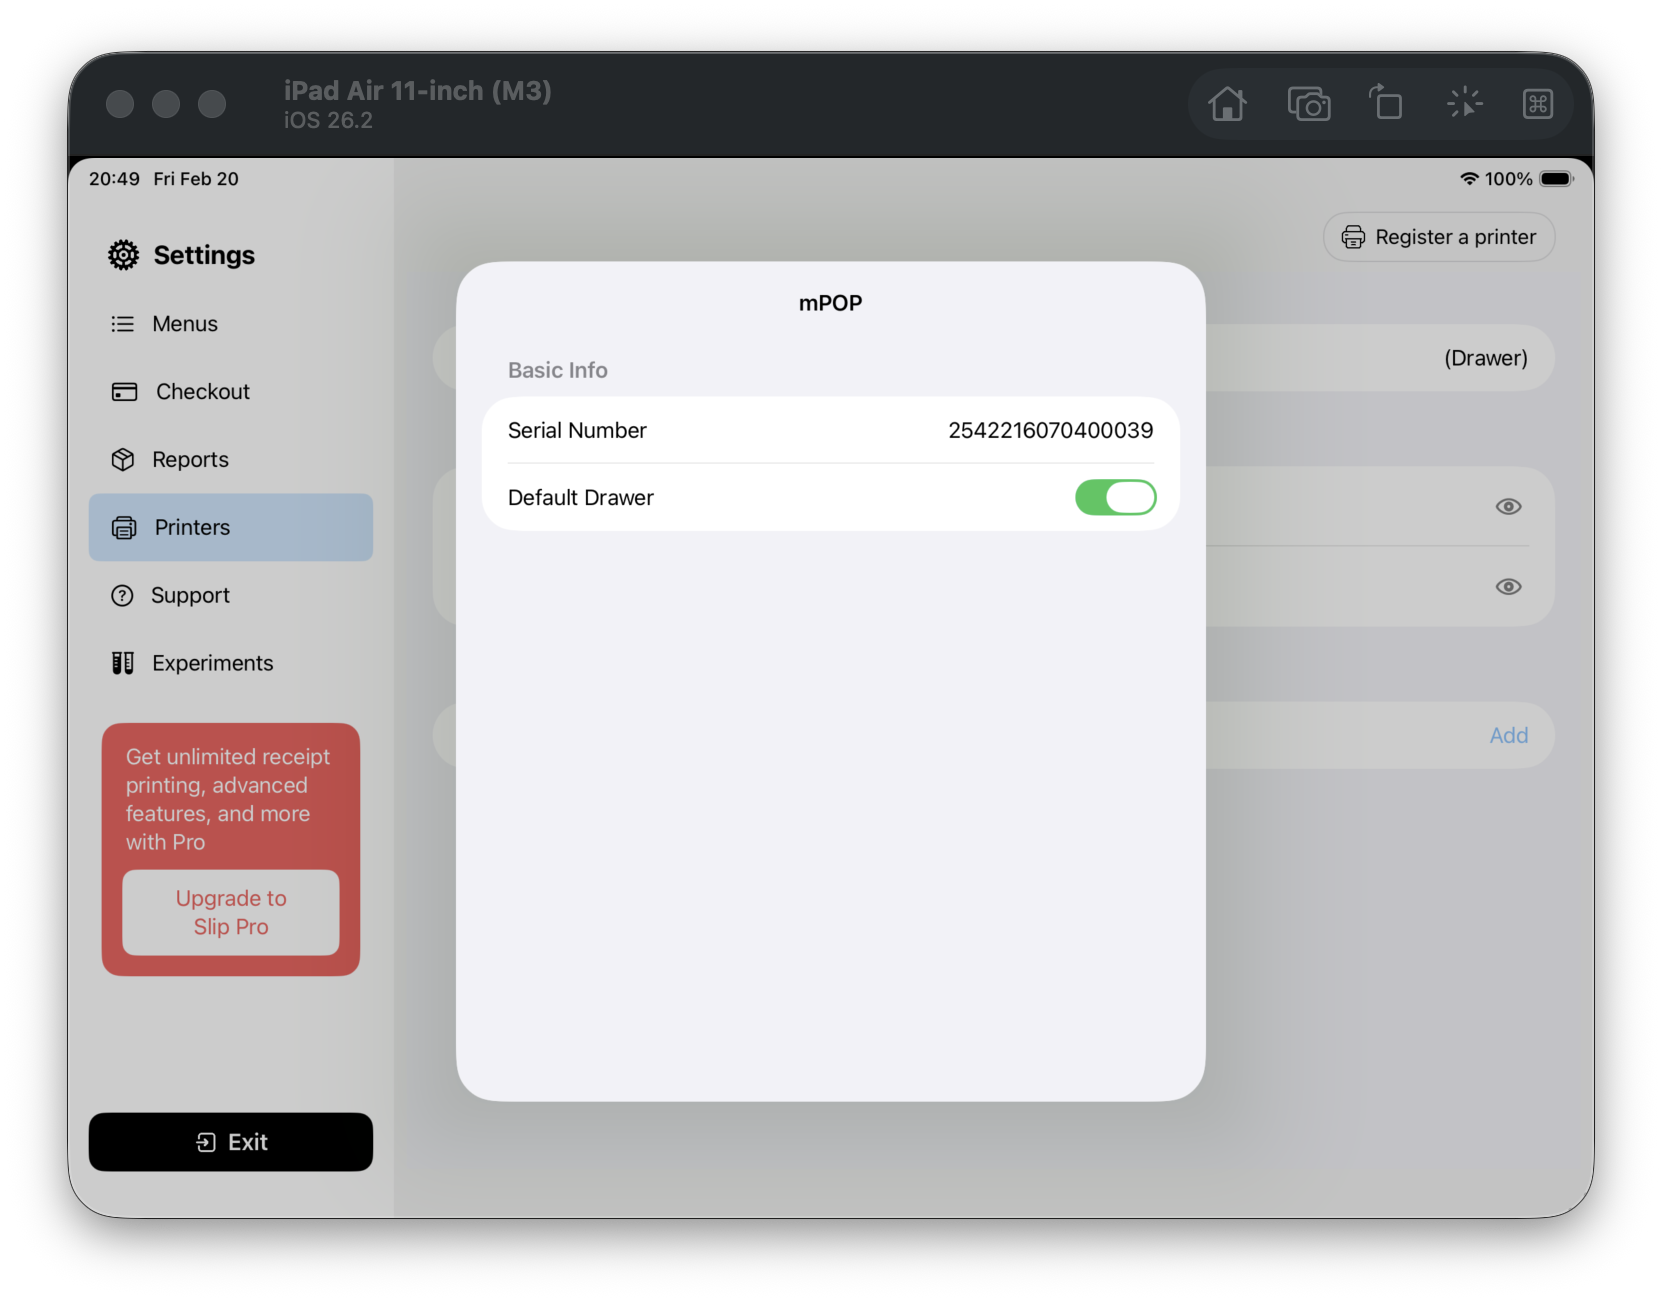
Step 5 (F05): Check registered printer info
Back on Printer management, tap a registered printer.
- Printer info screen opens
- Default Drawer toggle is visible
-
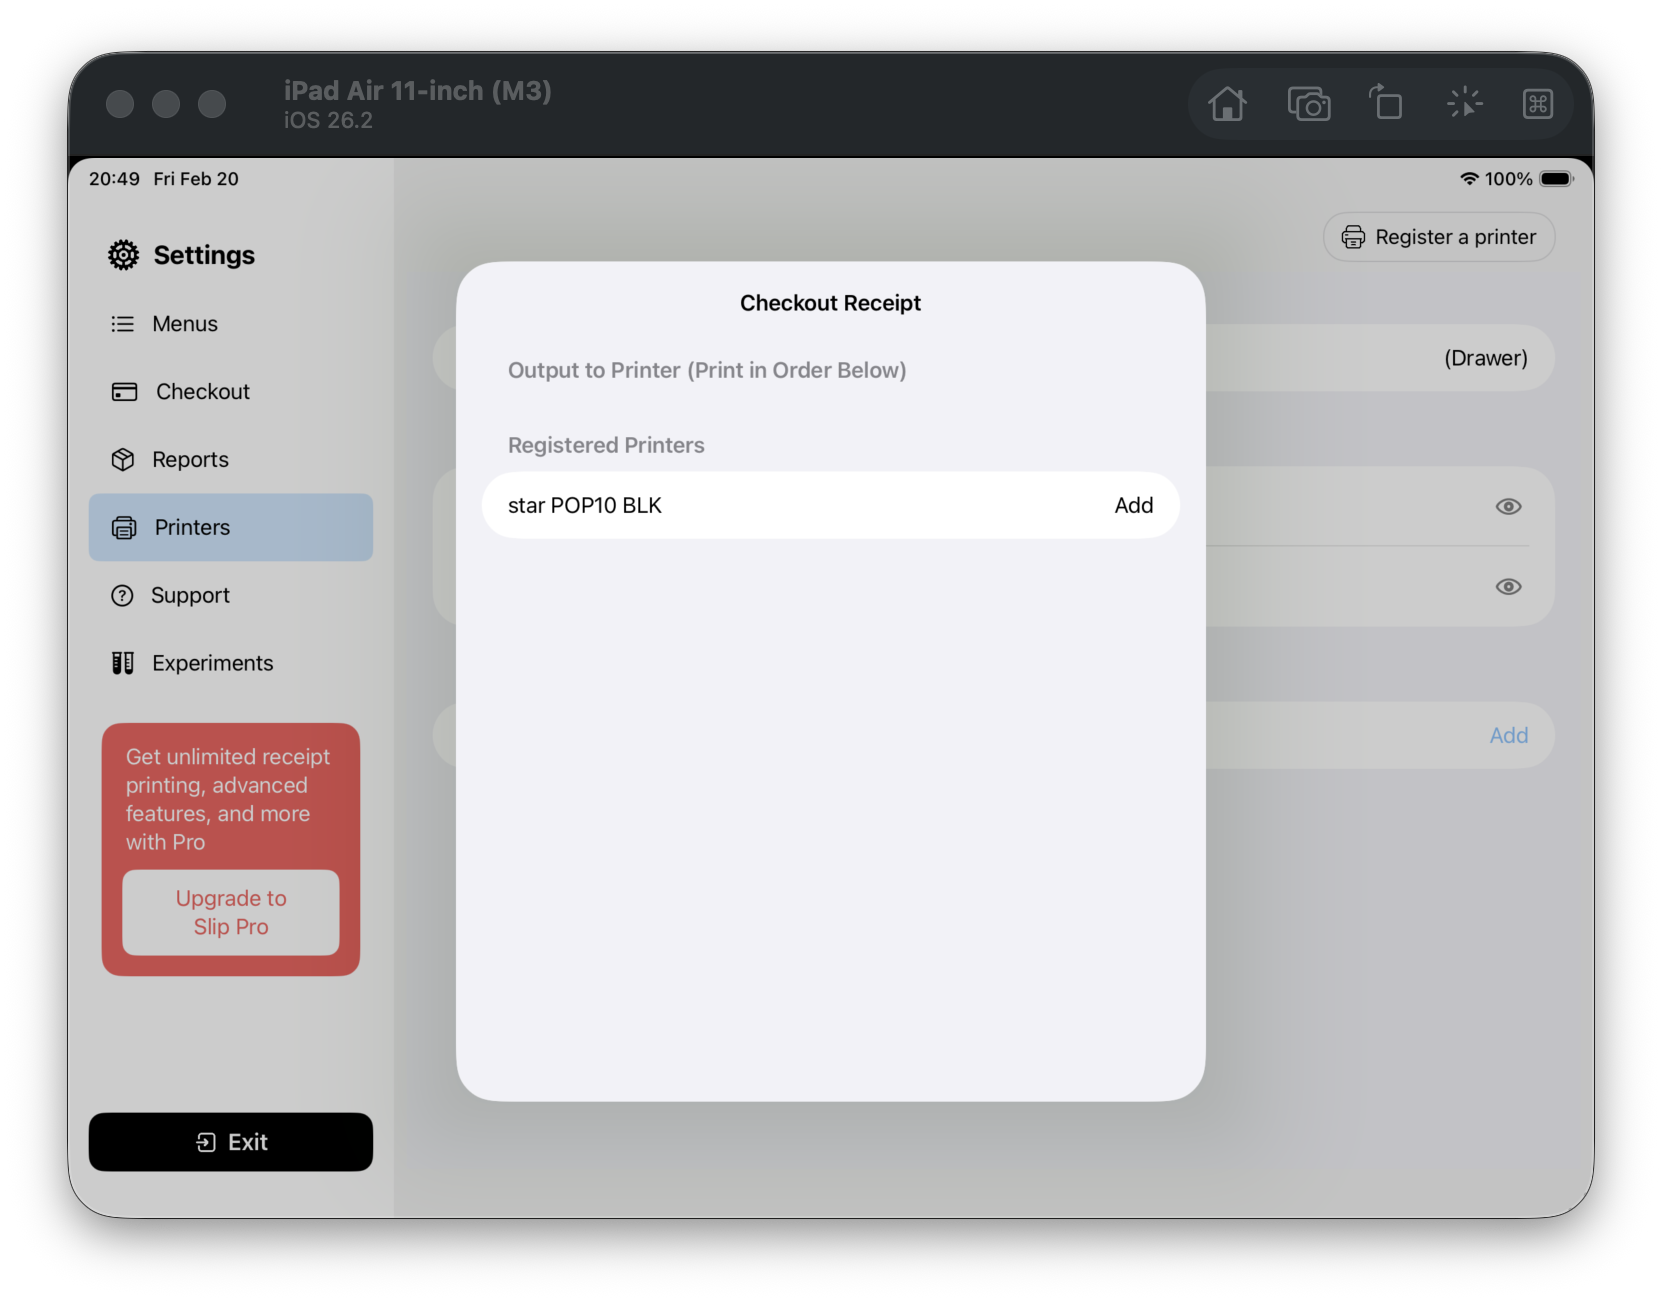
Step 6 (F06): Open receipt template routing
In Receipt template, tap Checkout Receipt.
- Print Routing screen opens
- You can see printers that can be added to routing
-
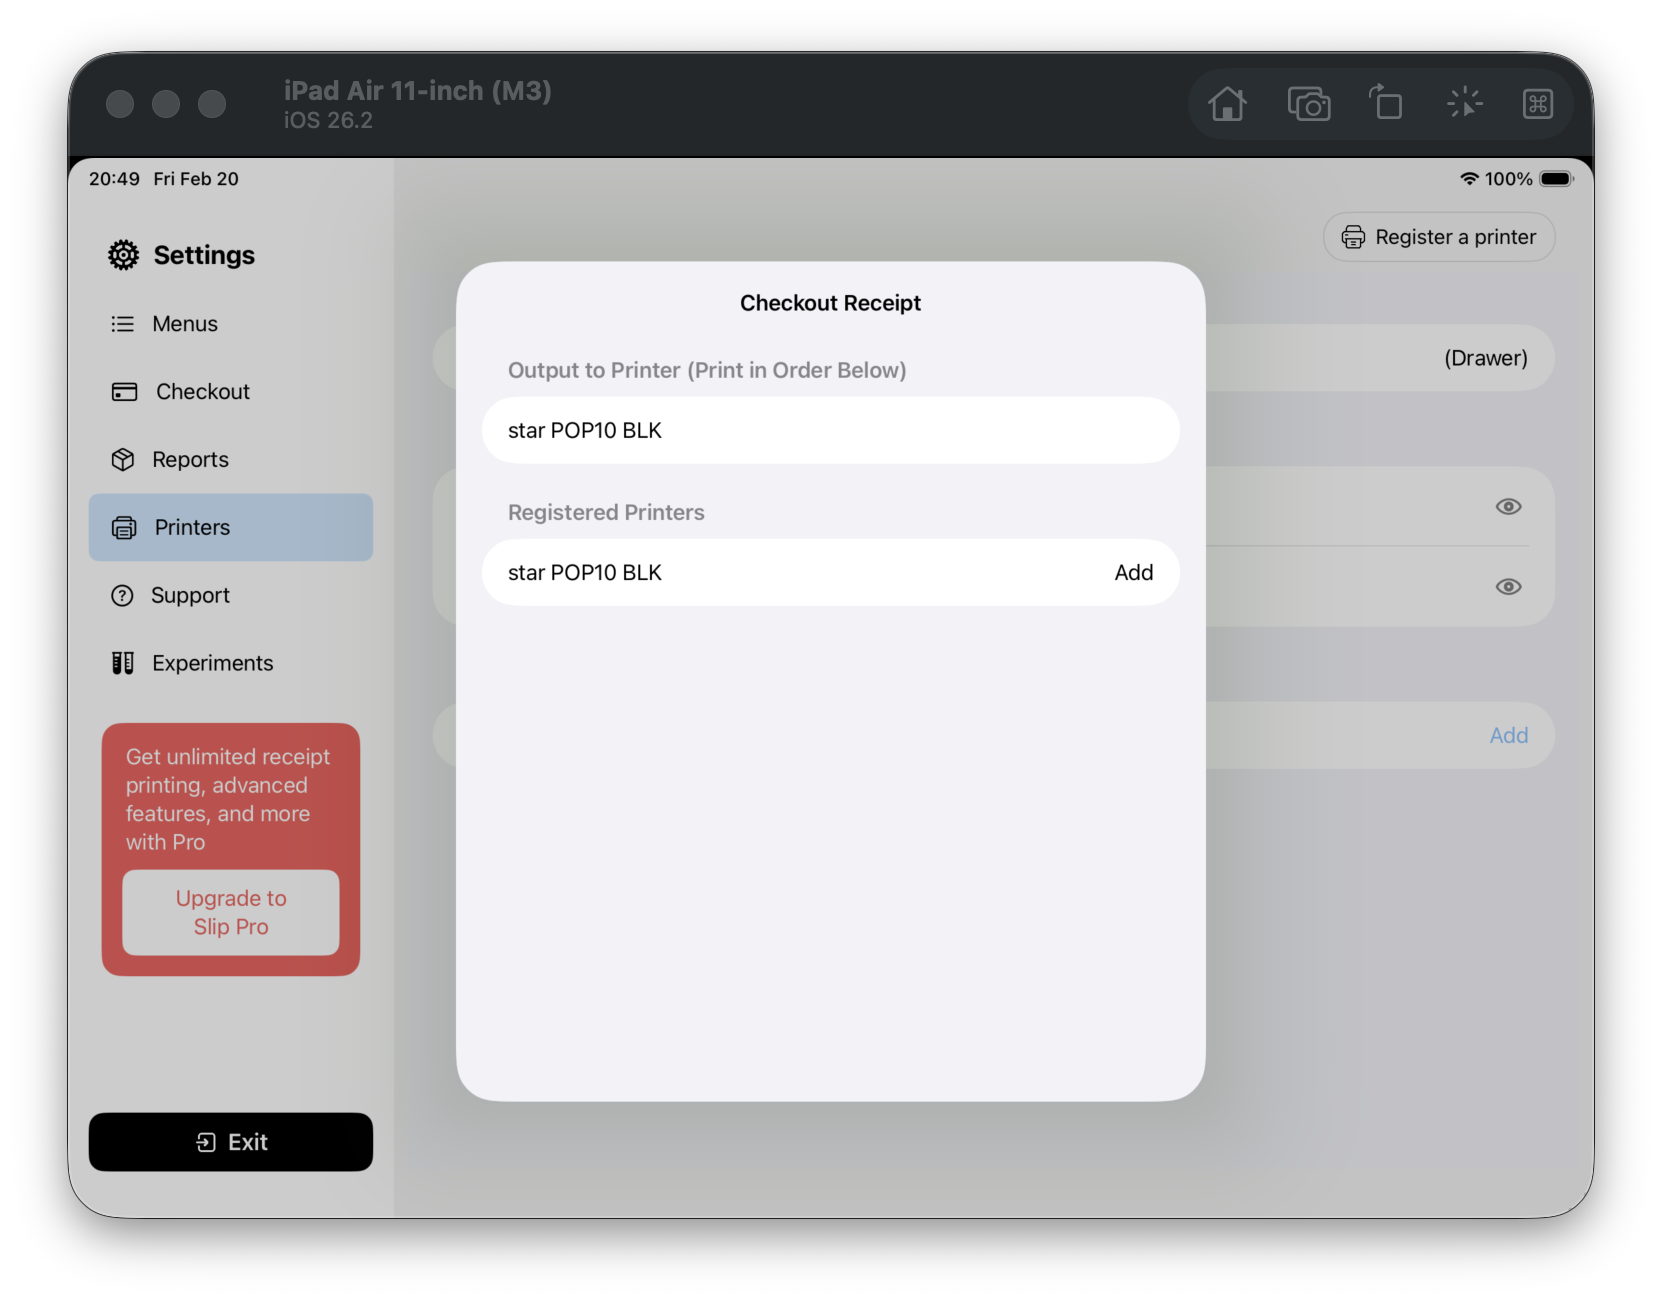
Step 7 (F07): Add one route
On the routing screen, tap Add on the right side of a printer row.
- The new route appears in the output order area
-
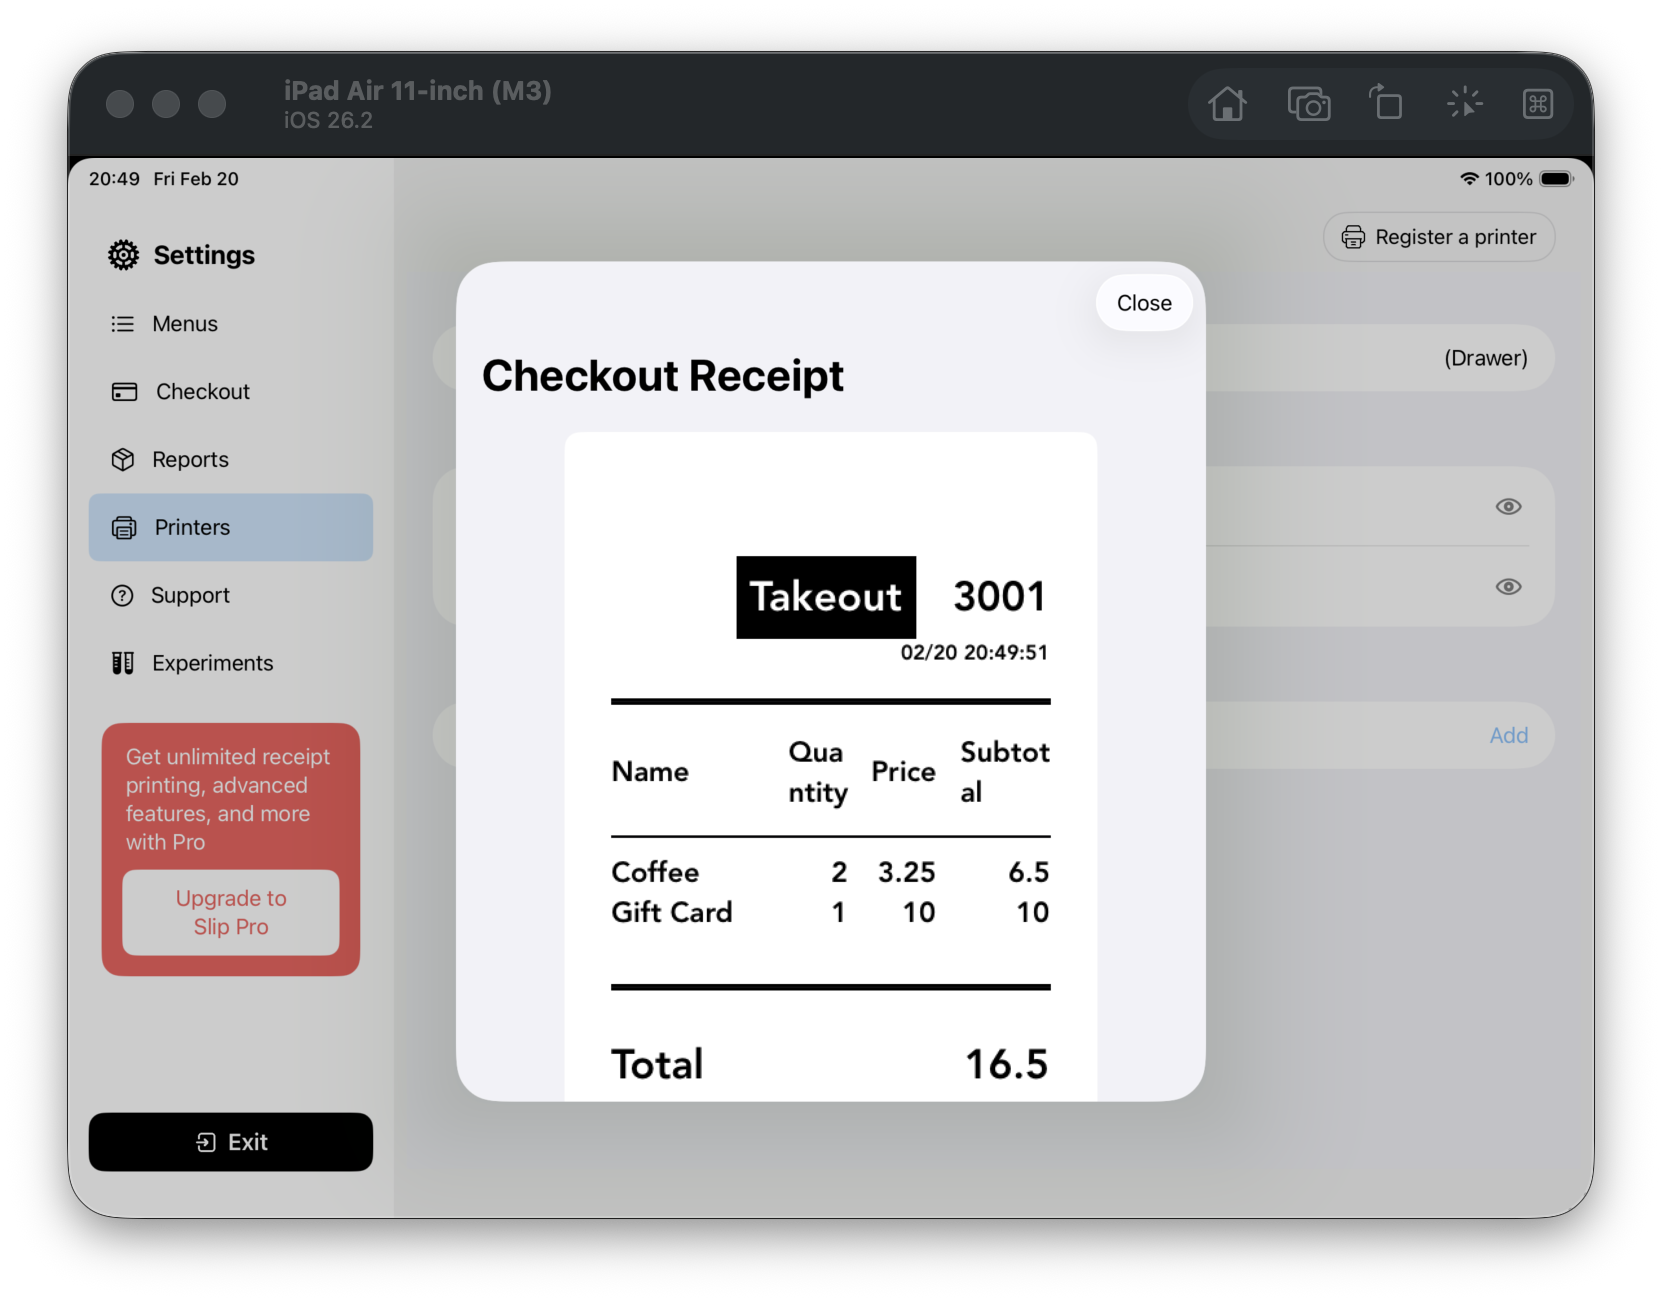
Step 8 (F08): Open template preview
Back on Printer management, tap the preview icon on the right of Checkout Receipt.
- A template preview sheet opens
- You can scroll and review the full receipt content