First opening flow (after menu setup)
Steps
-
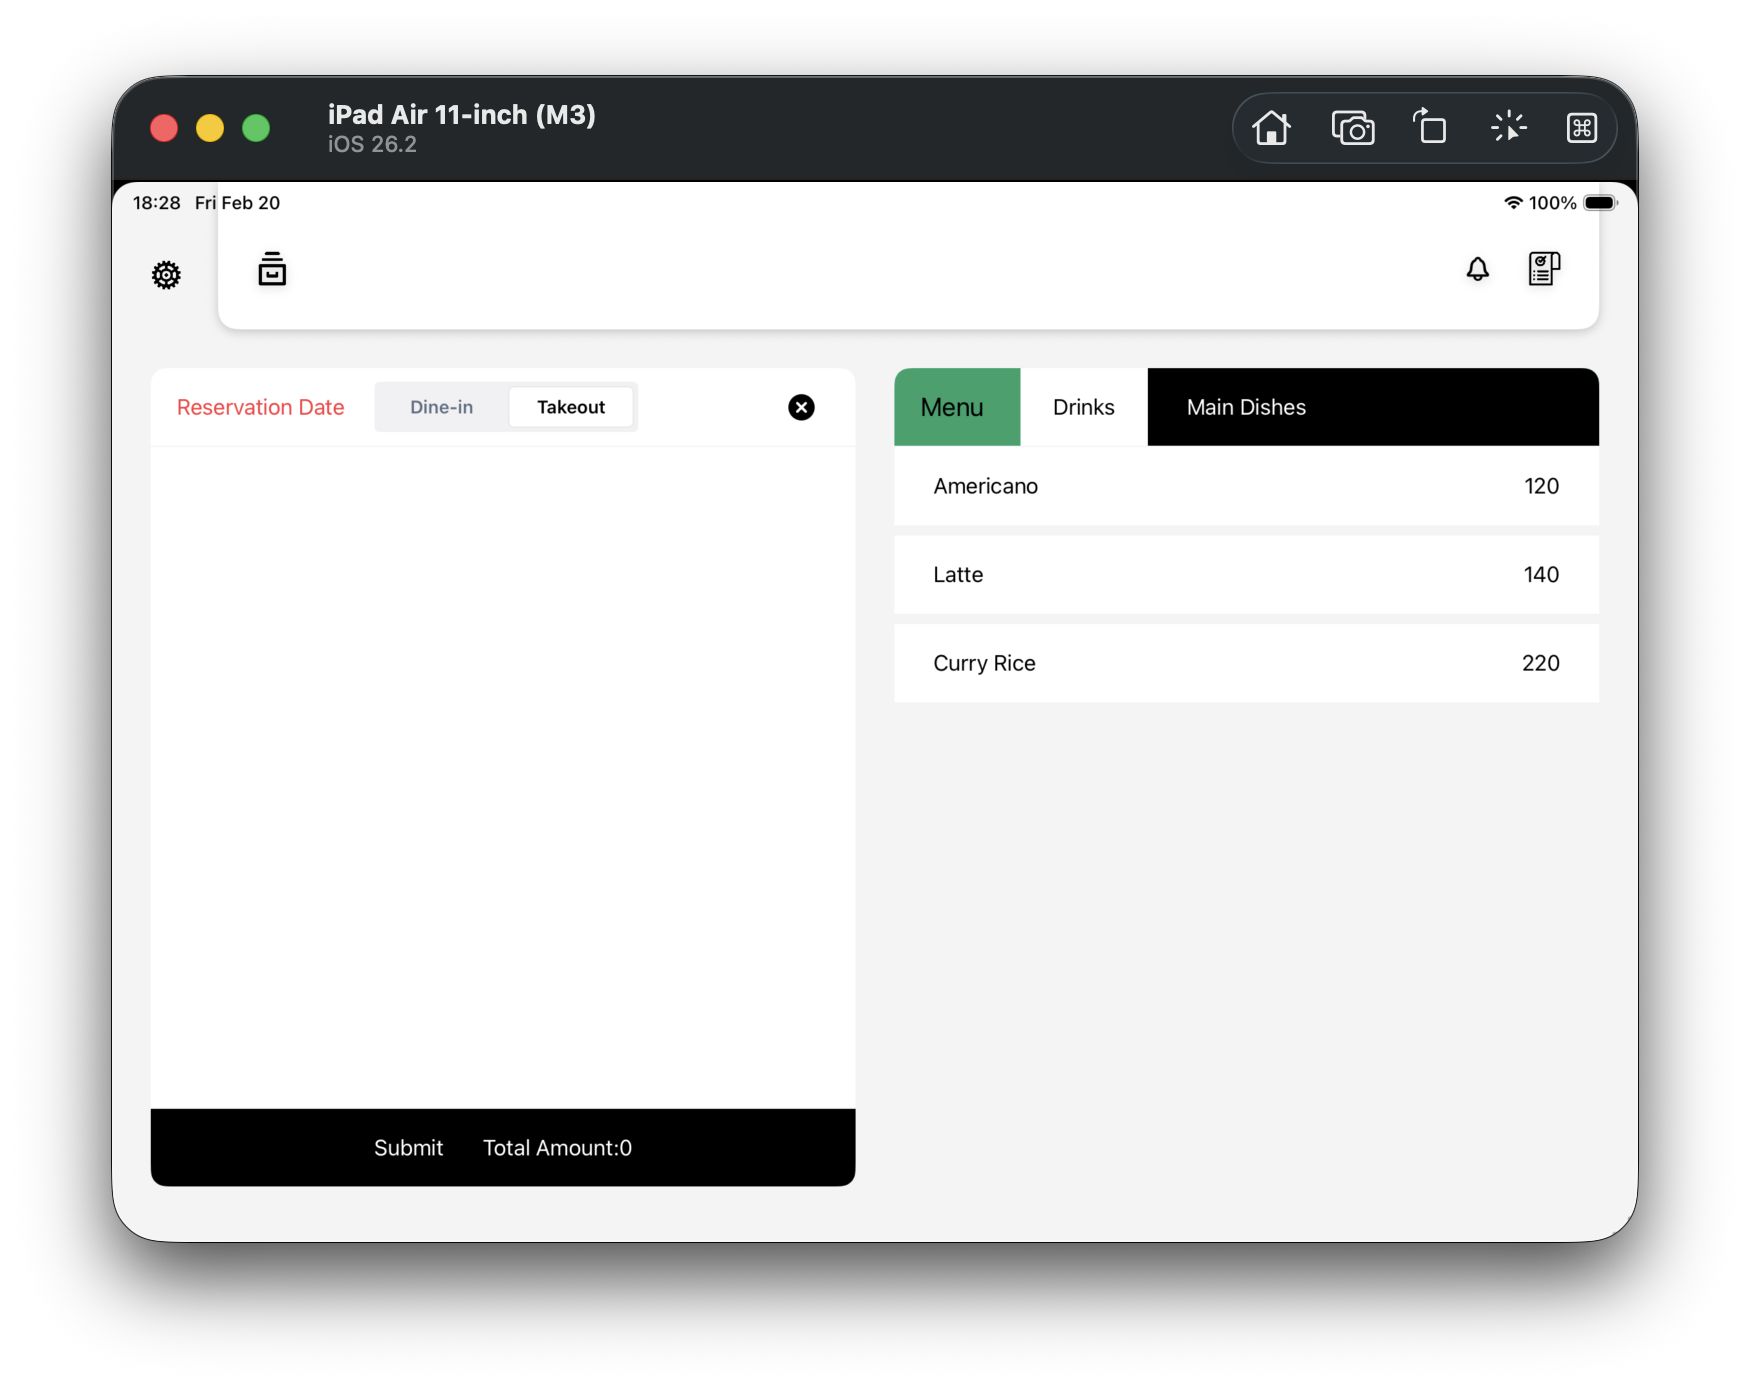
Step 1 (F01): Confirm the screen is ready for ordering
Check that menu items exist on the right and the order list on the left is empty.
- Menu item list is visible
- Submit appears at the bottom
- Total Amount: 0 is shown

-
Step 2 (F02): Select Dine-in or Takeout
At the upper-left, tap Dine-in / Takeout once.
- This switch affects delivery type for the order
-
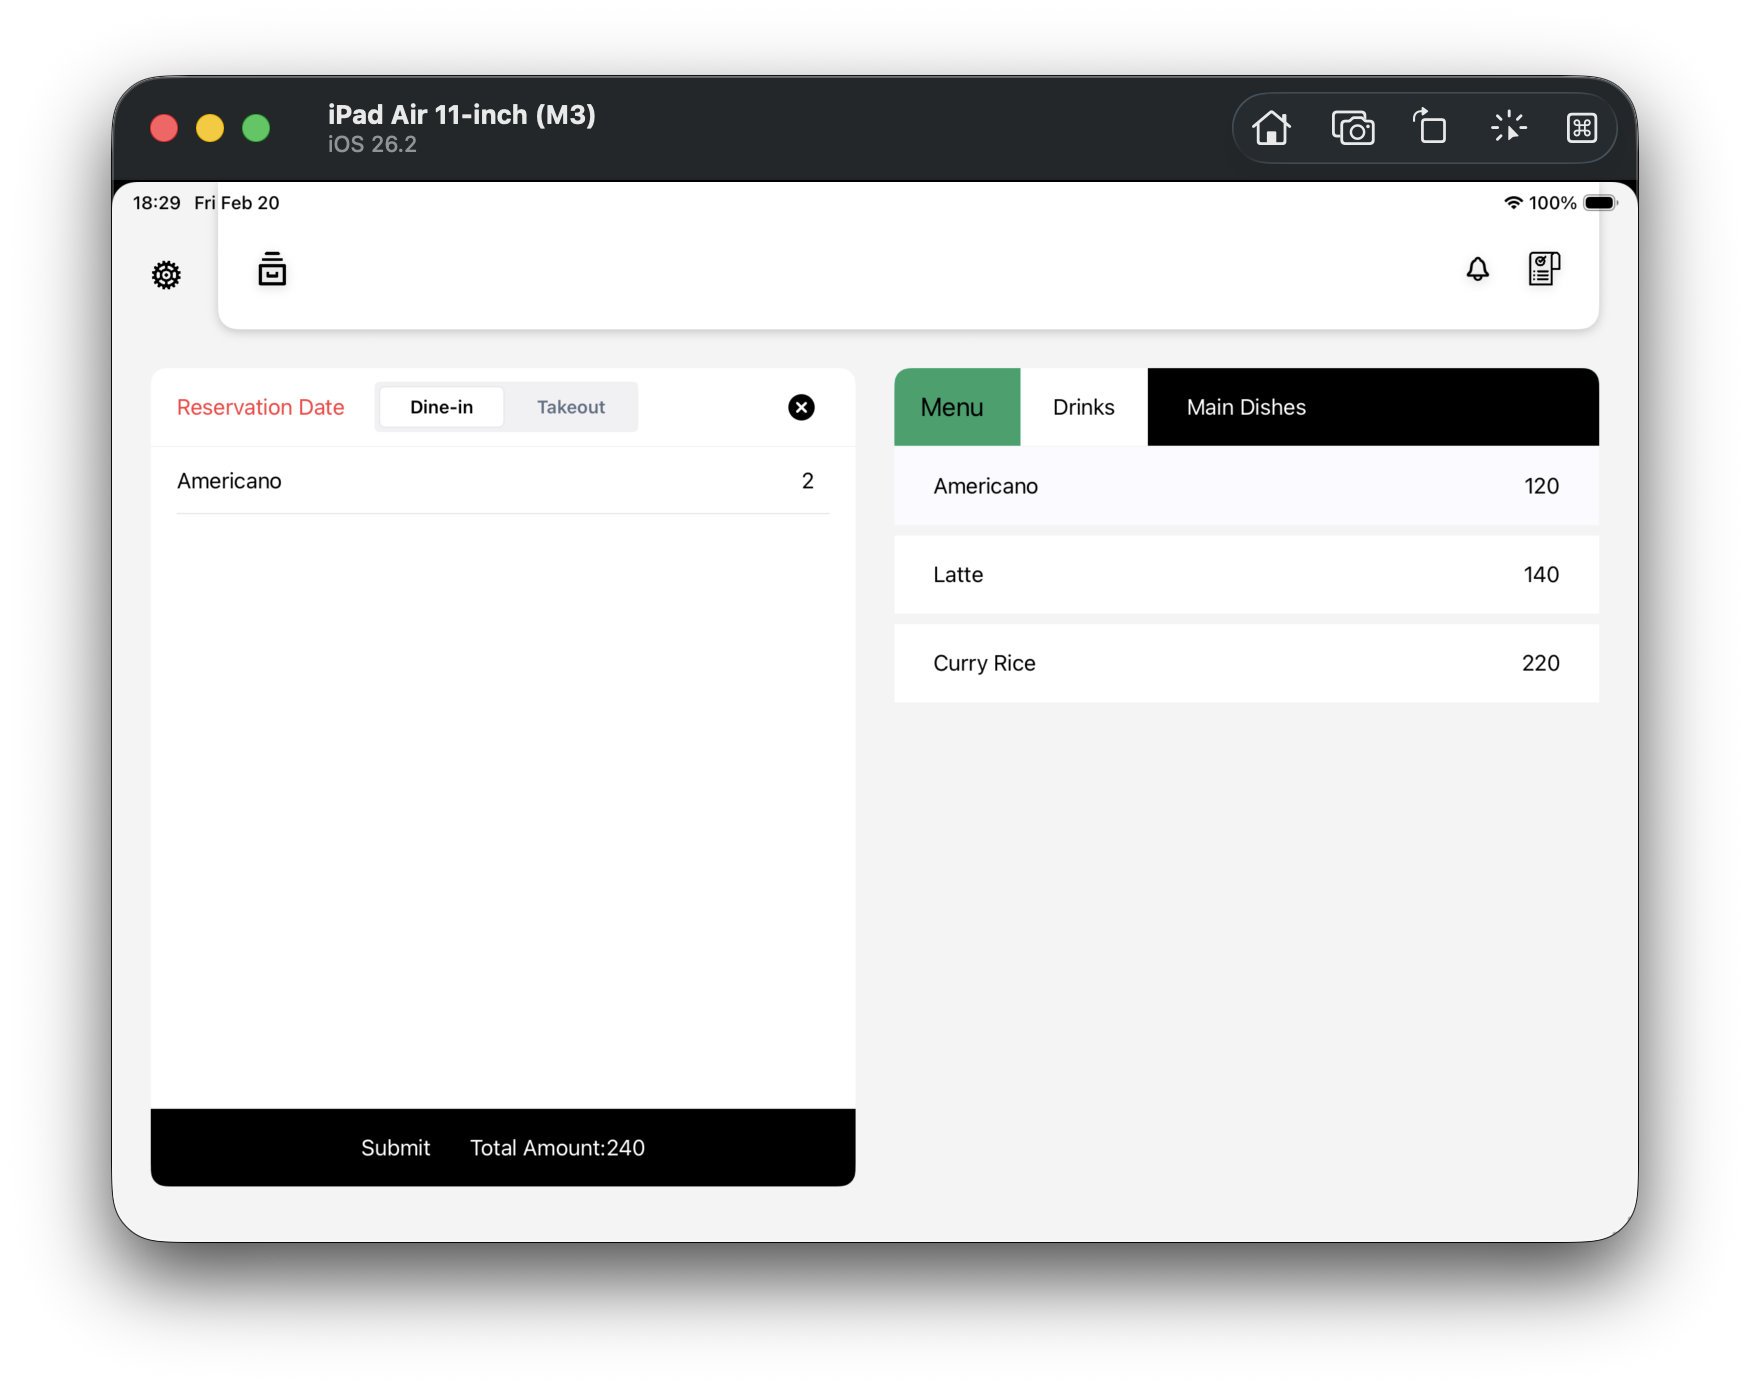
Step 3 (F03): Add first item
Tap one menu item on the right (for example, Americano).
- The item appears in the order list on the left
- Total Amount changes from 0 to the item price

-
Step 4 (F04): Tap same item repeatedly to verify quantity increments
Tap the same item one or two more times.
- Quantity increases on the same row instead of creating duplicate rows
-
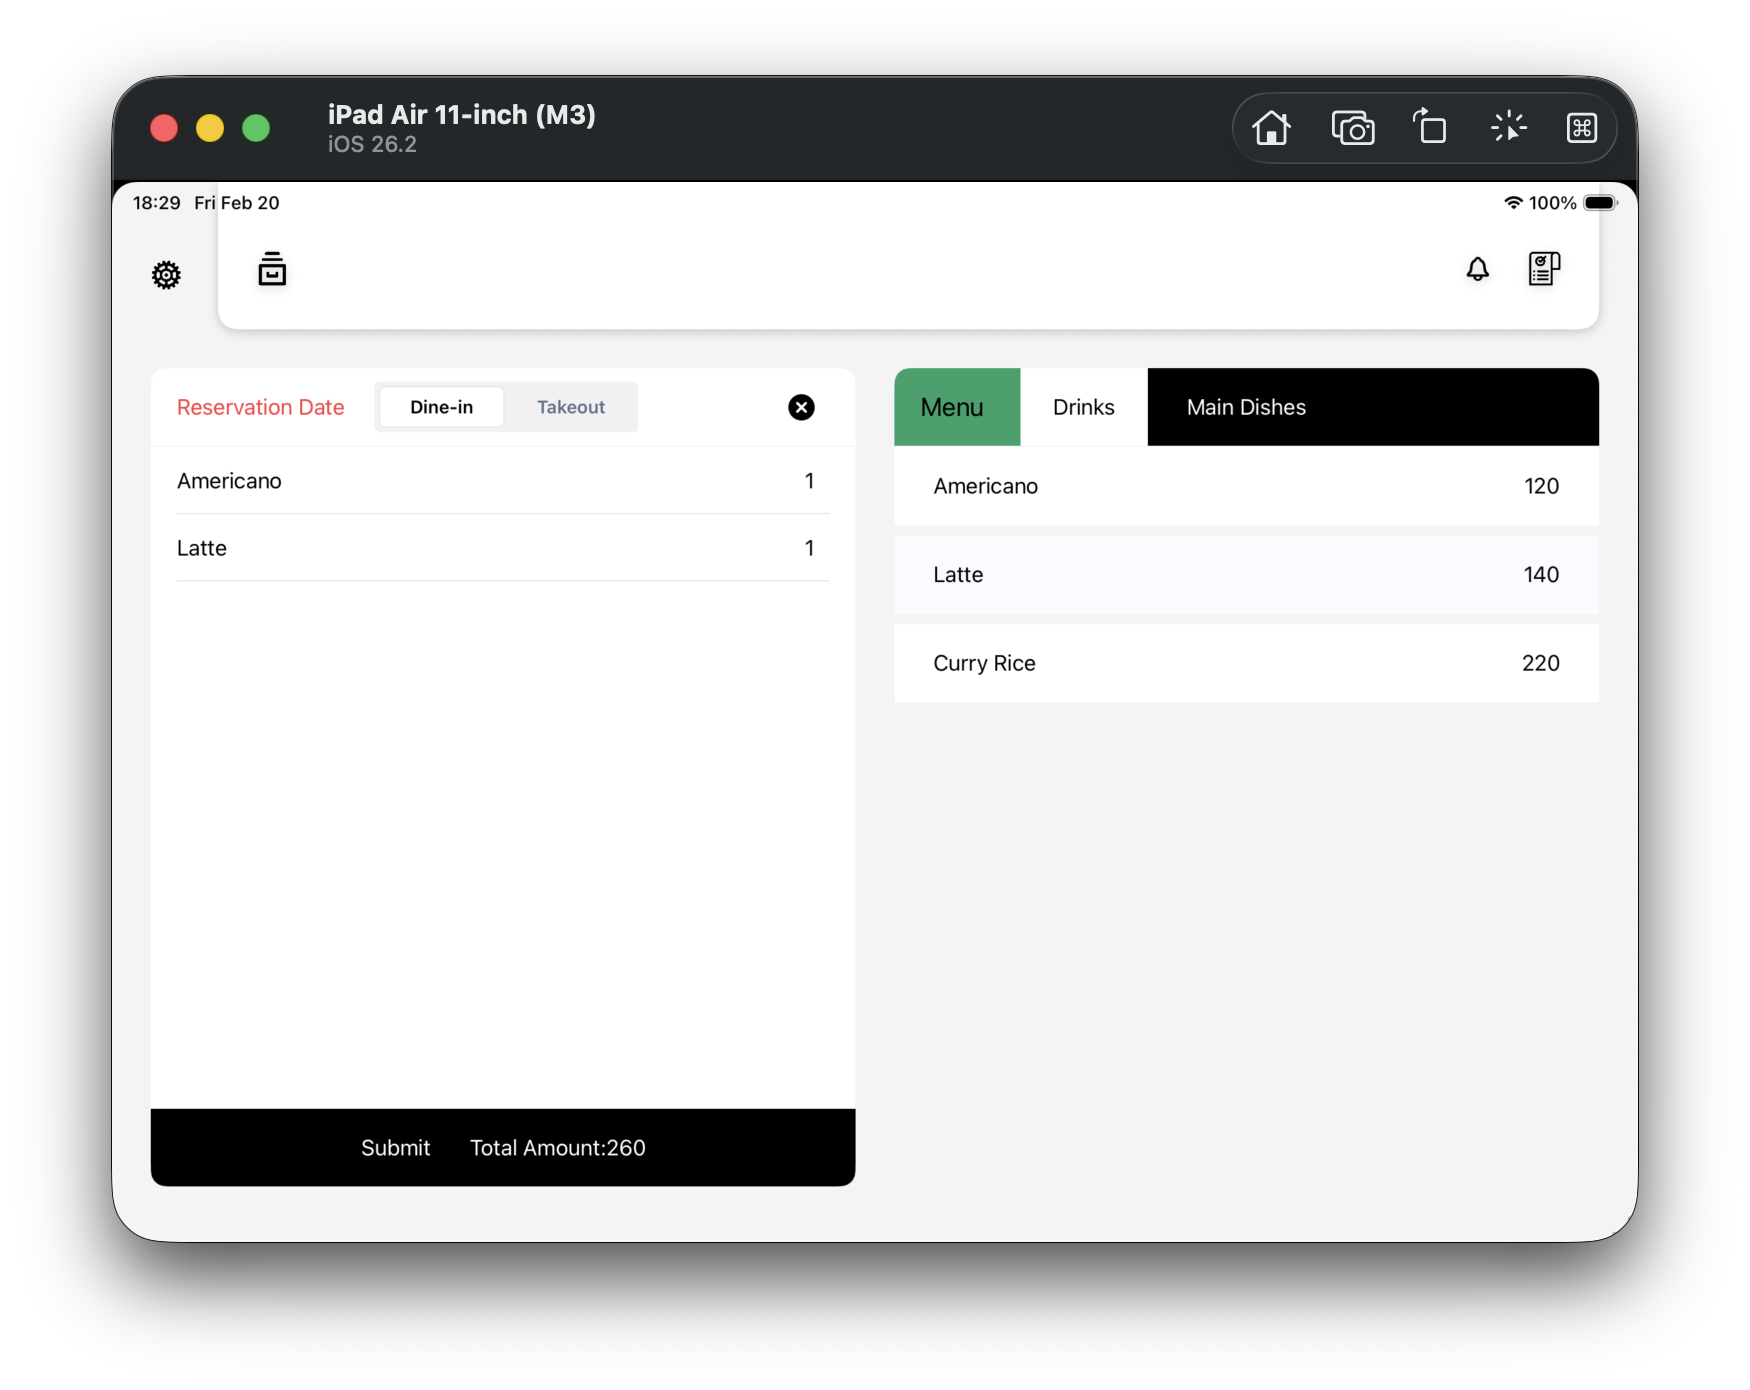
Step 5 (F05): Add second item and verify total
Tap another item (for example, Latte).
- Order now has at least two items
- Total Amount increases correctly
-
Step 6 (F06): Submit order
Tap Submit at the lower-left.
- The sale is created successfully
- Order draft is cleared
- Screen returns to ready-for-next-order state

-
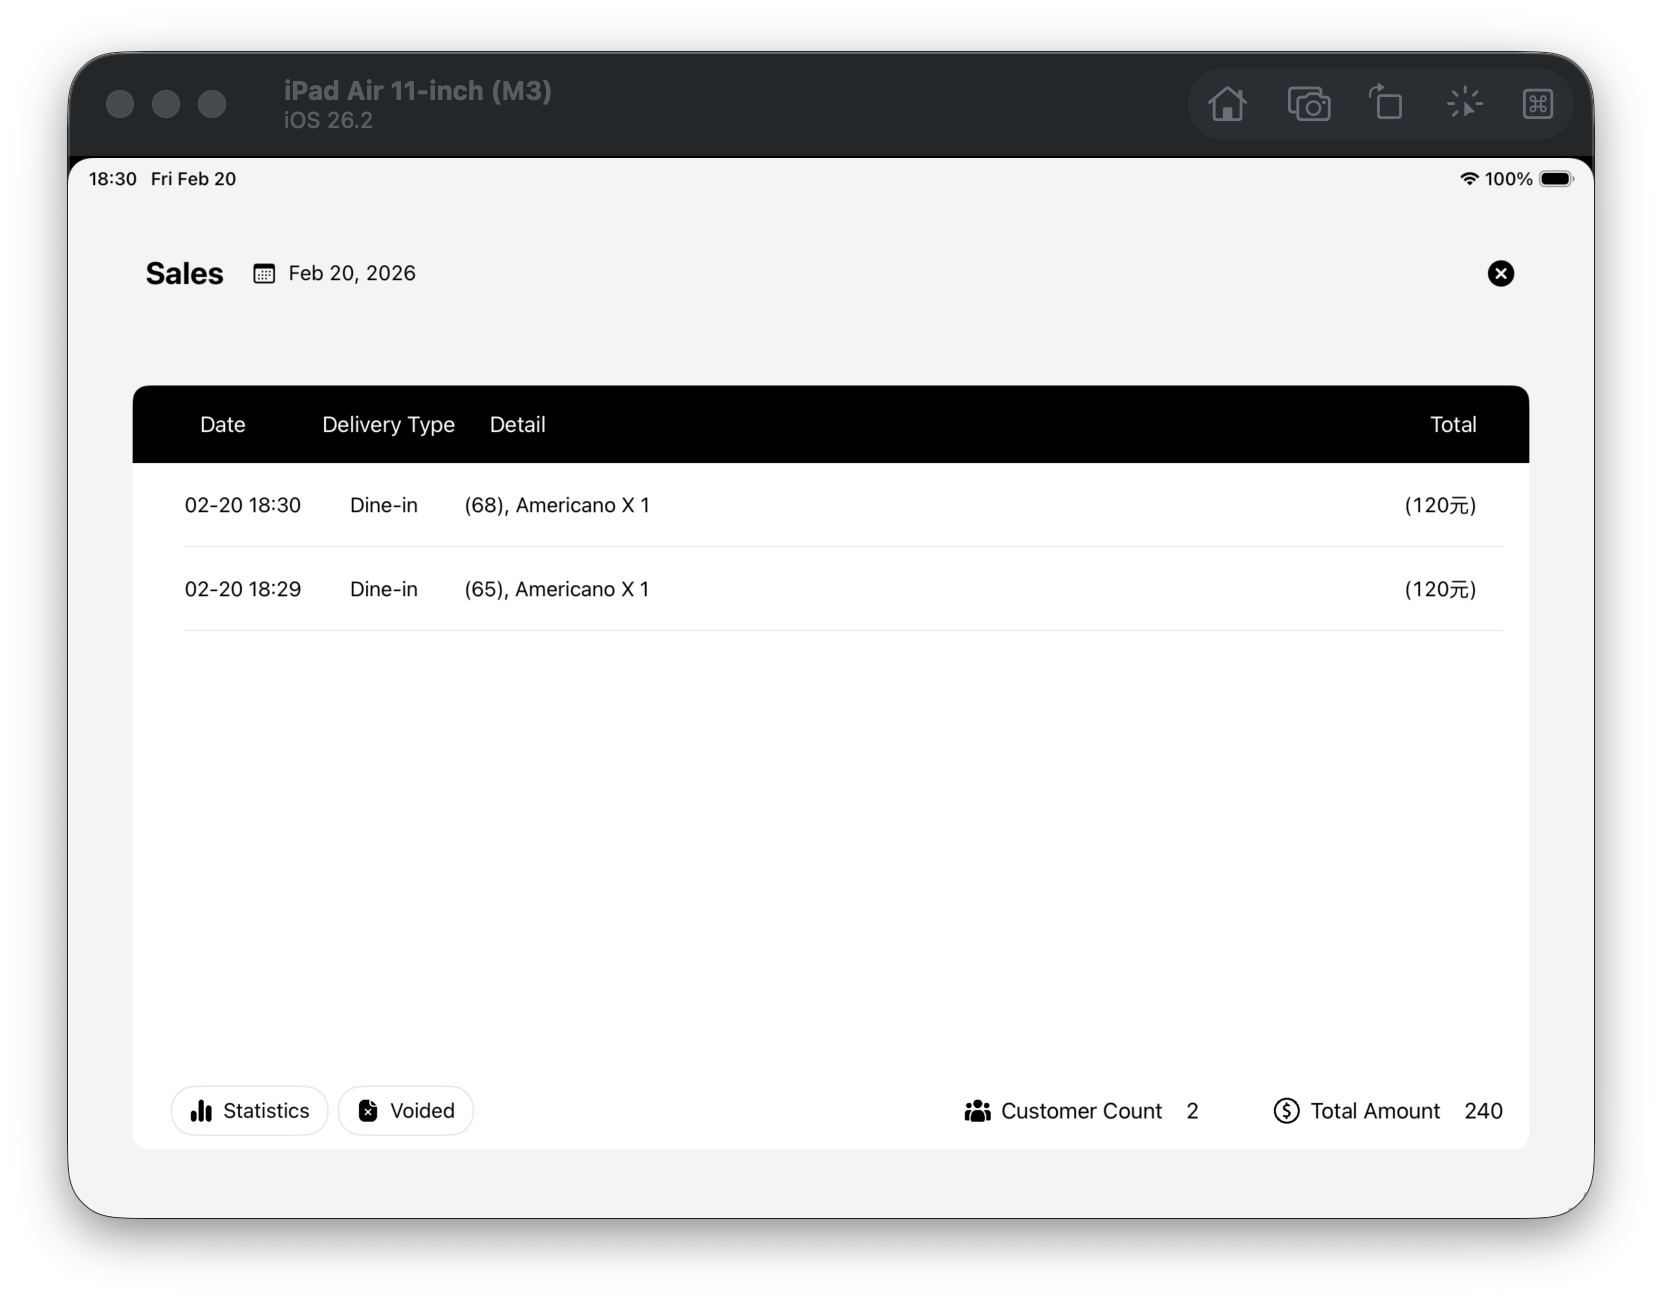
Step 7 (F07): Verify it in order list
Tap the order list button in the top-right toolbar to enter OrderListScreen.
- You can see the order you just submitted